Rock On With Our Custom Guitar Makeover
Set your whammy bar up to crushing the ‘standard guitar’ standard! Amp up the awesome with this quick, easy, and affordable DIY guitar tutorial that will leave you, and your new custom guitar feeling like a million bucks. And fret not; these stylish stickers are 100% removable, reusable, and guitar friendly!
YOU WILL NEED:
- Your FAVORITE RoomMates Décor (Find them Wall Decals!)
- A musical instrument (guitar, piano, drums- give them all an upgrade!)
- Scissors
- A credit/store card (for smoothing and edging)
THE STORY BEHIND MY GUITAR
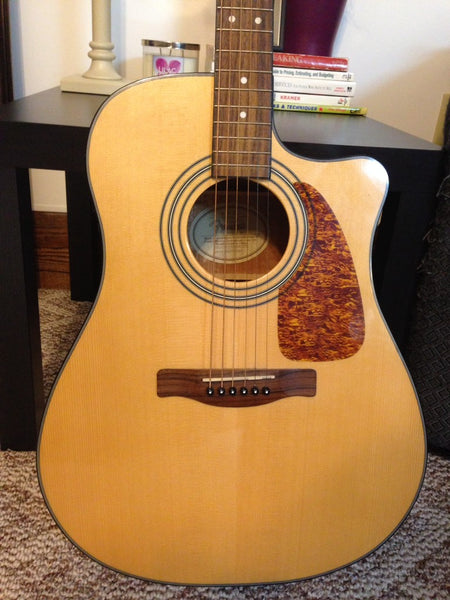
Transforming my standard guitar into something not so standard has not only been a project that was far beyond fun, but it has also already made a huge noticeable impact from that of its past life of lacking style. This was my first guitar of the four guitars that I now possess; the other three of them are purple and intricate in their own way. Over time, the basic standard music companion pictured above that had once taught me the basics of my music passion became unnoticed in its stand in my living room.
After giving it a fresh makeover reflecting both my style, and a style of its own, I’ve had multiple friends, family members, coworkers, and complete strangers bask in the wonderment of a guitar that they swear either once belonged to Taylor Swift (I feel so honored!), or that I purchased already made like that for some unimaginable sum of money (if only they knew that anyone could do it for as low as $15 with RoomMates Décor decals). What I loved most about my custom guitar project is that I got to fall in love all over again with the guitar that started it all. This was my first guitar and is now back to being my favorite. My revamped custom guitar has become quite the center of attention and is now the spotlight piece of my home that every one of my visitors has been obsessed with.
GET STARTED ON CREATING A CUSTOM GUITAR
First things first…make your musical best friend shine by giving it a good wipe down with a dry/damp cloth. I used a dry cloth first to get any dust off, and then a barely damp cloth to spot clean any sort of dirt off. This will give the decals the perfect surface to lie on. Just make sure your guitar is completely dry before sticking any decals on!
Read on to see our custom guitar tutorial...
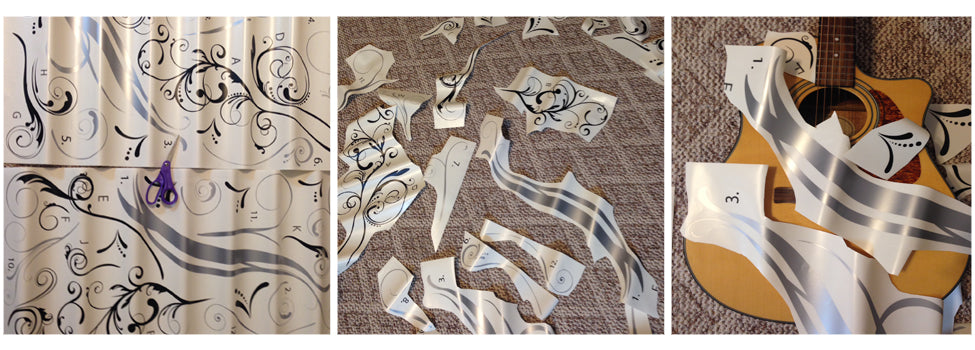
Next, lay out the product sheet that your decals came on. This is a good opportunity to look at each design your package includes, and to start to envision where you are going to place the decals. I used RoomMates’ “Forever Twined Giant Wall Decals." Each product is different and unique, so there’s something for every personality and style! If your decals are larger scale (like the ones I used-pictured below) it is definitely worth the extra little bit of time to cut them out as separate elements so they are easier to visualize and adjust placement with before actually sticking them.
*Since RoomMates Décor decals are easily removable without any sticky mess left behind, you can skip this step if you’d like.
Once you’ve got an idea of where you’d like to place your fabulous guitar decal stickers, its time to peel and stick! Carefully remove the backing from the decal sticker and place it where you’d like. You can adjust, remove, or replace your decals as much as you want, so peel and stick away!
*TIP- Don’t be afraid to cut the design of your RoomMates’ wall decals to fit it around your instrument’s hardware!
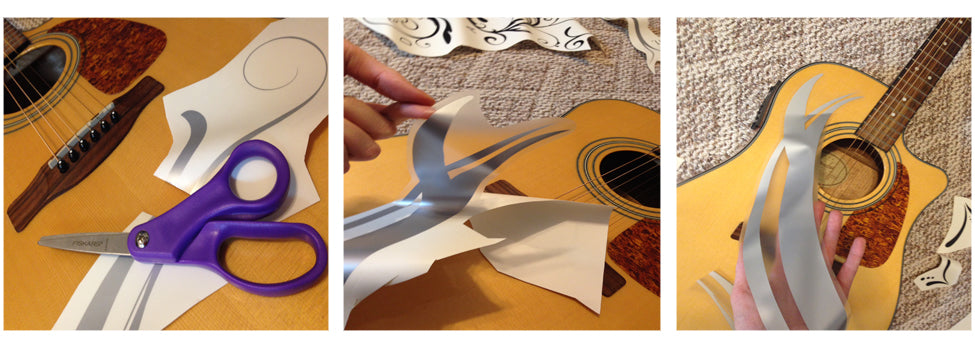
While decaling around and over my guitar’s hardware, I found that using a credit card to “edge” was the perfect tool to get a sharp and clean appearance. By using the corner of the card, I was able to get in the tiniest nooks and crannies, and underneath the strings with minimal effort. Additionally, using the card as a bubble squeegee to smooth out my decals and prevent air bubbles as I placed them was fun! Once your decal is tight to the edge of your hardware, you can trim appropriately (see middle image below).

Incorporating the design of the Forever Twined Giant Wall Decals around the sound hole, over the bridge, underneath of the strings, and over the pick guard really took the “custom designed look” over the top. Through trial and error, the best way to continue your design off of the face of the guitar and onto the sides and the back is through making cuts. By cutting the design right past the edge curve of the guitar and lining up what was just cut with the seam it was cut from, you get a streamlined and seamless continuation of your design. You can’t even tell that cuts were made. It simply appears like your guitar was born and made that legendary! Don’t forget to trim any little “tails” like the one in the third picture below (by the bridge). It definitely makes all of the difference appearance wise.
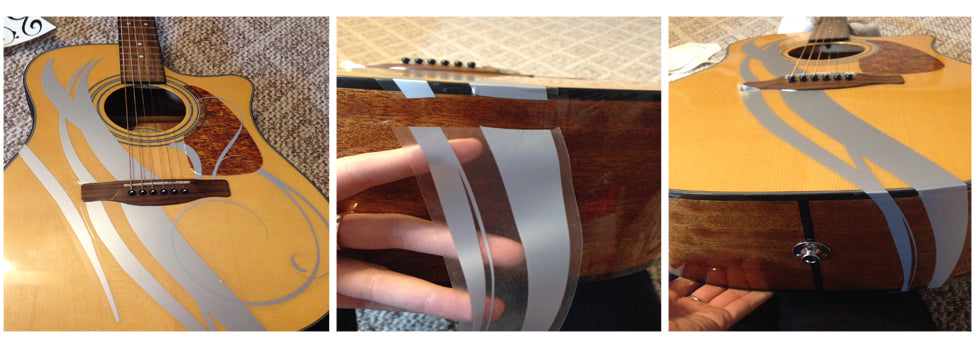
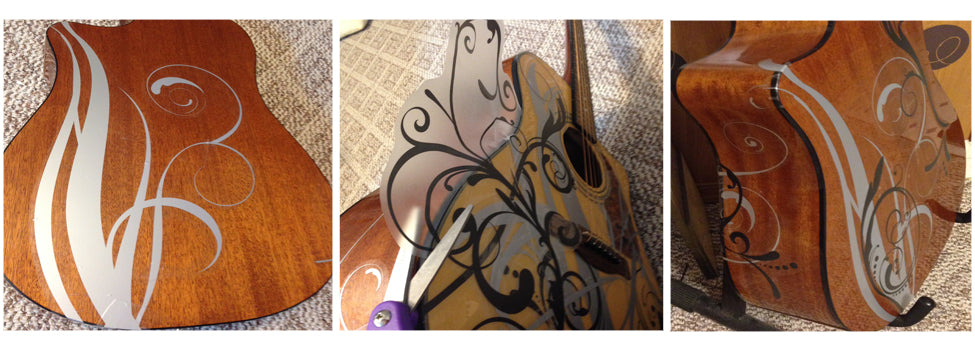
Once you’re happy with the face of your guitar, show the sides and the back some center stage attention! I’m completely obsessed with the look of these peel and stick decals over top of the wood- especially on the back and sides where the darker wood’s shine is the perfect complimentary embellishment. It doesn’t even look like a sticker!
To carry your design from the front to the sides, it’s the same process as directly above. This is a really impactful way to stand out from the crowd with your own bold style. Most custom made guitars only have designed faces (and cost WAY too much money), but with this tutorial and your RoomMates’ peel and stick decals, you truly can have it all!
I always like to save the best for last. This next step is my favorite, and it will be your favorite too! Simply step back, pick your jaw up off of the floor, and gaze in awe at the masterpiece you just created (you, yes you.)! I had a hard time believing that the new custom guitar I was looking at was in fact the same one I had to dust off prior to beginning this project…
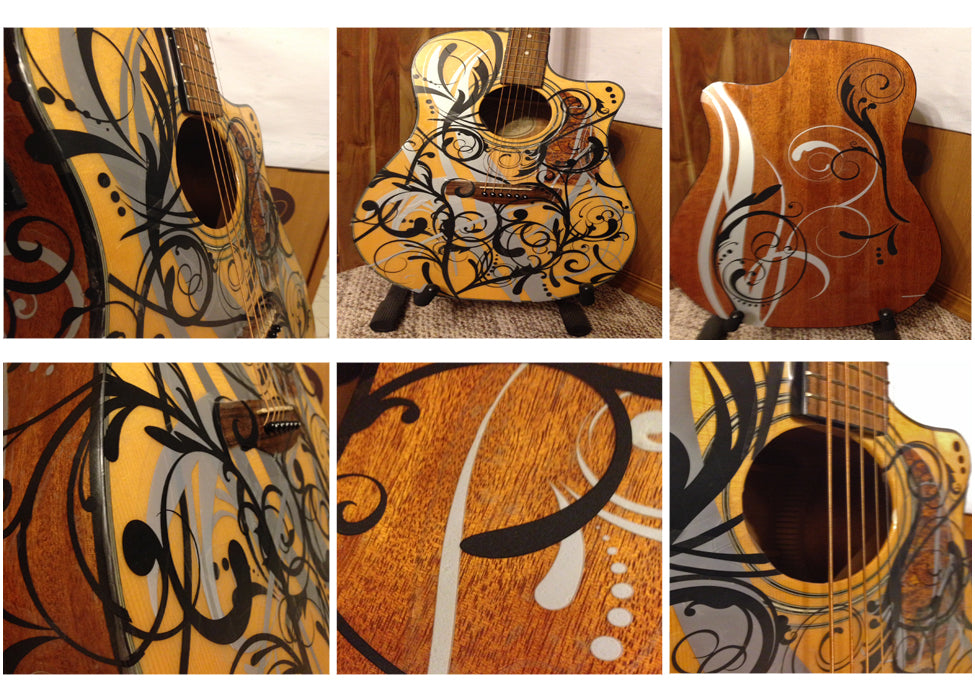
In just a few simple steps, you left “basic” and “standard” behind by transforming your musical best friend into a piece of art that you can be proud to rock. Congratulations, you are now the owner of a BRAND NEW CUSTOM GUITAR thanks to a little bit of peel and stick love from RoomMates’ wall decals! Your instrument, your style, and all fun!
Stand out from the crowd and get ready to shine in the spotlight with your new custom guitar of glory! Your guitar will not only turn heads, but it will also never go unnoticed again. Rock on!
To see my custom guitar project in action, watch my DIY Guitar Makeover below on our RoomMates Décor Youtube channel. Don’t forget to like, comment, and subscribe so we can keep bringing you the content you love!
